Step-by-step guide
Clearing the cache, one entry at a time
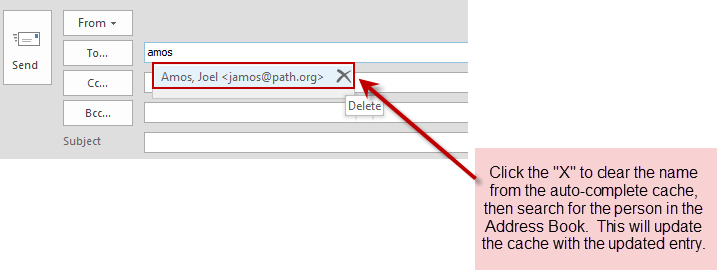
- Begin typing a person’s name and when the cached entry comes up, click the X on the right-side of the entry, as shown below.

This will remove that entry from the auto-complete cache. The next time you address a message to that person, their most current email address and display name will be added back to the cache.
Clearing the entire auto-complete cache
If you have a lot of stale entries in the cache, you can clear them all at once using two different methods.
Method 1:
You can clear Outlooks auto-complete cache with a simple command.
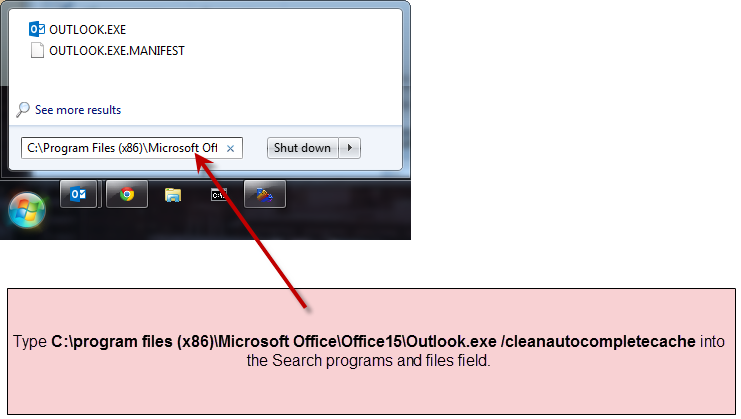
- Close Outlook then click the Start button
 .
. - In the Search programs and files field type (or copy and paste): C:\Program Files (x86)\Microsoft Office\office15\outlook.exe /cleanautocompletechache, as shown below and press Enter. This will open Outlook and simultaneously clear the cache.

Method 2:
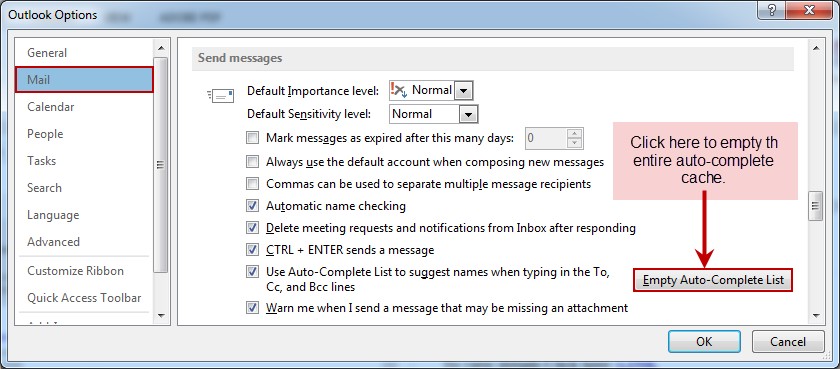
In Outlook, go to File → Options → Mail. Scroll to the Send Messages section and click Empty Auto-Complete List to clear every entry in the list. The cache will start rebuilding itself as you send out new messages.


