How to Encrypt a Flash Drive to Secure Its Contents
Encrypting your removable drive is the best way to protect any data it contains. If you lose an unencrypted drive, anyone who finds the drive can easily access the data. The data on an encrypted drive cannot be accessed unless you know the encryption password. Any removable drive, such as a flash drive or external hard drive can be encrypted easily in Windows 10 using BitLocker.
Step-by-step guide
Formatting the Drive you Want to Encrypt
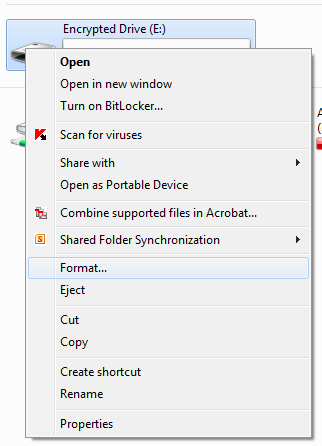
The first step in encrypting your drive is to format it. This will completely erase the drive, so if you already have data on the drive, you must back it up to another location. After you format and encrypt the drive, you can copy the data back to the drive. Formatting the drive only takes a few minutes.
- Connect your removable drive, wait for windows to recognize the drive and assign it a drive letter, and go to Start → Computer, right-click the drive and choose Format…, as shown below.
- Select the exFAT file system and check the Quick Format box. Then click Start, as shown below.

Encrypting the Drive
After formatting the drive, you can begin encrypting the drive.
- Right-click Start then click Control Panel.
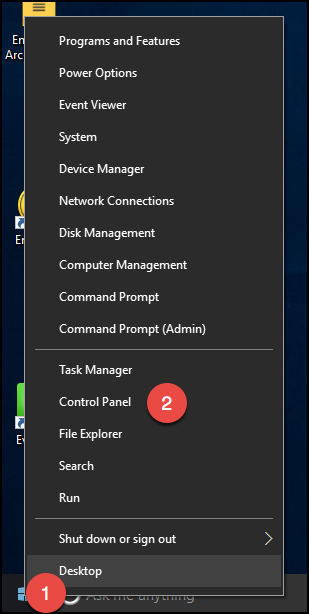
- Click BitLocker Drive Encryption. BitLocker will list all the drives that can be encrypted.

- Click Turn On BitLocker next to the removable drive you want to encrypt, as shown below.

Setting the Encryption Password
When choosing how to unlock the drive, check the box next to Use a password to unlock the drive. Enter the encryption password twice. Any time you connect the drive, you will need to provide this password to access its contents. Without the password, the data is inaccessible.
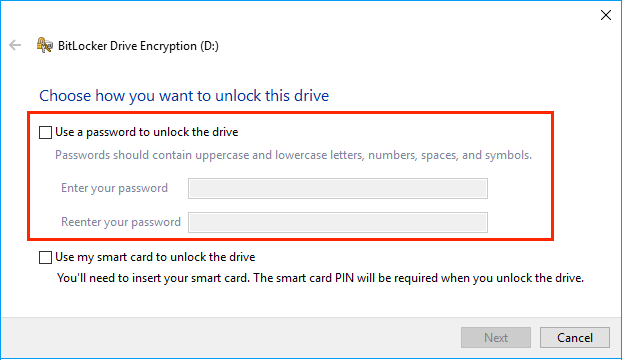
The password you use to unlock the drive is not tied to your login password and it cannot be reset or changed by the helpdesk. If you are going to encrypt your drive, use a password you can remember and create a recovery key.
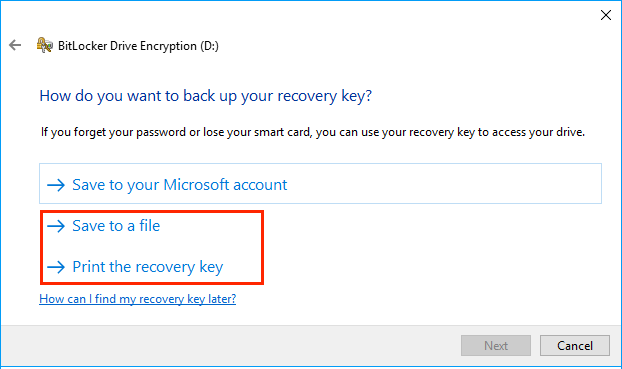
Storing the Recovery Key
Next, select how you want to store the recovery key. The recovery key lets you access the drive if you forget the password. You can save the recovery key to a file or print the key out. If you print the key, make sure to keep it in a safe place. If you lose the password and the recovery key, the data will not be accessible by anyone, anywhere, at all, ever. If you chose to save the key, keep this file somewhere safe and preferably on a different computer than the one used to encrypt the drive. Never store the recovery key on the same drive you’re encrypting.
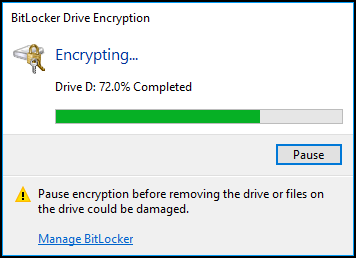
Starting the Encryption
After saving or printing the recovery key, you can begin the encryption process. Depending on the capacity of the drive, this can take from several minutes to several hours so let this proceed uninterrupted, preferably overnight if you’re encrypting a high-capacity drive. After the drive is encrypted you can disconnect it from your computer or begin adding files to it.
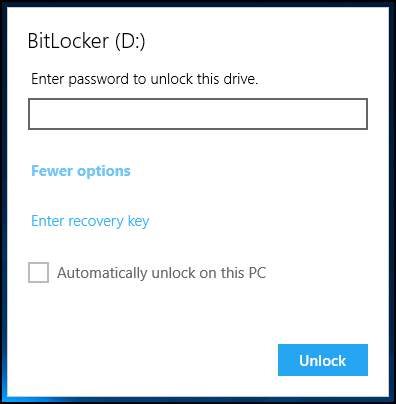
Accessing the Encrypted Drive
When you connect the drive to a computer you will be asked immediately for the password. You can also prompt Windows to remember the password on the computer you’re using so you never have to supply it on that computer, but you will on other computers. Any computer running Windows 10, 8 or 7 will be able to read the contents, with the correct password, but it may not always be accessible on computers running Windows XP or Windows Vista.